Add a Timecard

No matter how you add time in CosmoLex, the result is a timecard entry. 

In this article, we will walk you through the fields of a timecard to better assist you in adding or editing time. 
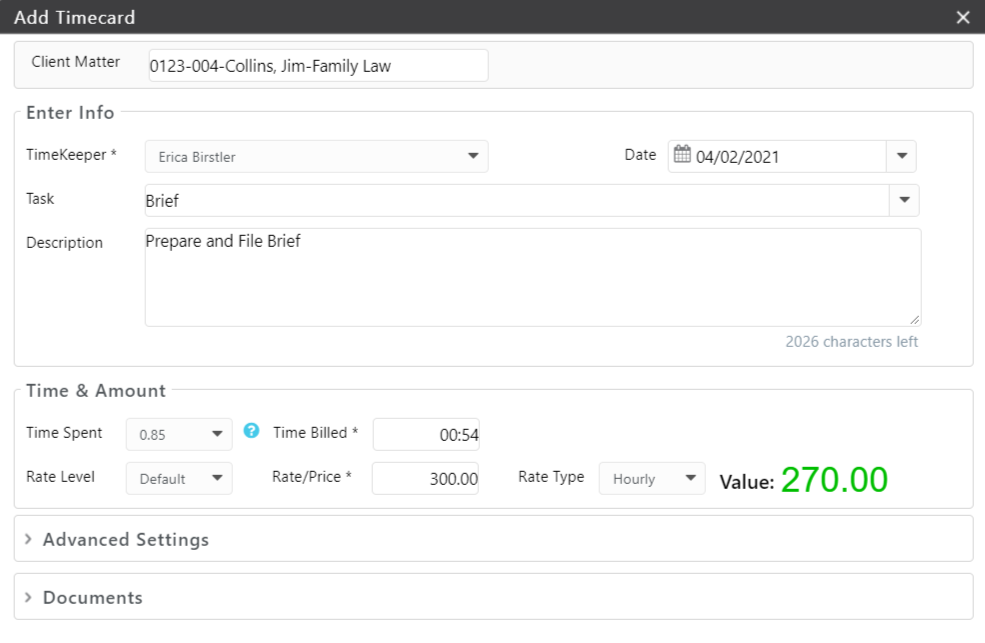
Note

You can tab through time entry fields. The fields’ border will change to blue when selected.

Client Matter 

If a matter is already selected when adding time, this field will auto-populate. Otherwise, you can begin typing the client, matter, or file number and a suggested list of matches will display for you to choose from. 

This is a required field.

Info Section

Timekeeper (required)
Date (required)
  • The date your firm completed the task. This is the date that will display on the invoice.
  • Defaults to today’s date, but can be changed.
Task
  • Brief title of the activity which was done. Detail should be left for the description field.
  • You can type freely in this field, choose from the suggested list (while typing), or use the drop-down list to choose from saved tasks. To customize your task list, see Customize your List Items.
  • This field on its own is not required, but you must have either task or description completed.
  • By default, invoices will include tasks and descriptions, but that setting can be changed.
Description
  • A detailed description of the activity which was done. There is a limit of 2,048 characters.
  • You can create default descriptions for your saved tasks when you customize your list items.
  • You can also create shorthand codes to assist with quicker data entry. 

LEDES Billing

If this matter is set up for eBilling, You will have slightly different options when entering a timecard.
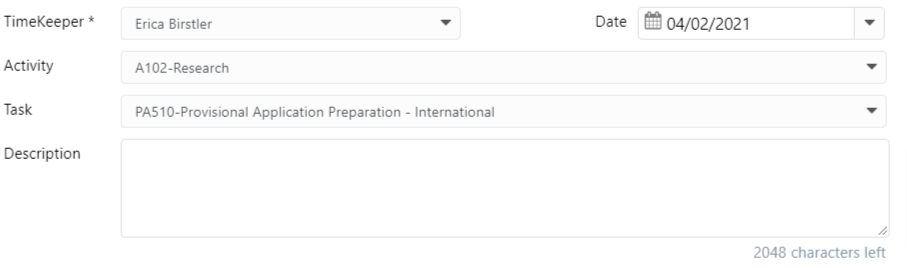
Activity
  • This field is only available for matters with eBilling enabled.
  • Choose an activity code from the preset code list. These can be customized under Setup > List Items >Tasks > UTBMS and restricted on the matter, if needed.
Task
  • Choose a task code from the preset code list. These can be customized under Setup > List Items >Tasks > UTBMS and restricted on the matter, if needed.

Time & Amount Section

Time Spent
  • Use the drop-down to select time spent. This field is not required.
  • By default, the system will take time spent and round it to the nearest tenth of an hour for time billed. However, this setting can be changed.
Time Billed (required)
  • This is the amount of time that will display on the invoice, and calculate against the chosen rate.
  • If time spent is already chosen, time billed will automatically be rounded based on the minimum timer unit setting and displayed in hours and minutes.
  • You can overwrite this amount if needed and the value will recalculate.
Rate Level
  • Default level will be pre-selected unless there was a matter localized rate set. You can also change the level here if needed.
  • You can customize labels for your rate levels under the List Items section.
  • The value of these rate levels will depend on the timekeeper chosen. You can see that value in the rate/price field.
  • Learn more about default rate levels for timekeepers.
Rate/Price
  • Populates based on the timekeeper and rate level selected.
  • Matter-specific billing rates also impact this field entry.
  • You can overwrite this field.
Rate Type
  • Defaults to an hourly type and works with the corresponding rate.
  • To bill a flat rate for the task select Flat and enter the flat amount in the Rate/Price field. This will not calculate against time billed.
Value
  • Total amount to be billed for this task.
  • If your Timecard is based on an hourly rate type, Value = Rate/Price x Time Billed.
    If your Timecard is based on a flat rate type, Value = Rate/Price

Advanced Settings Section
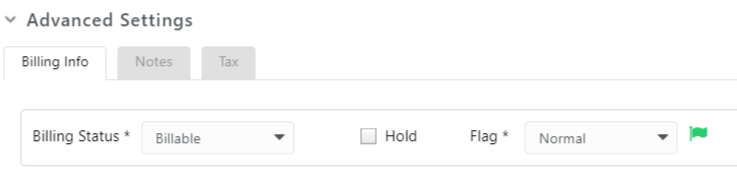
BILLING INFO TAB
Billing Status Billable
  • Default option for hourly matters.
  • Timecard value will add to the unbilled balance and appear on your next invoice.
  No Charge
  • For courtesy items that you are completing free of charge.
  • The activity and $0.00 amount will display on the invoice.
  Non-Billable
  • Default (and only) option for fixed fee and contingency matters, but can also be chosen for hourly files.
  • Timecard value will not add to the unbilled balance or be included on the invoice. 
  • This option is typically used to track productivity on fixed fee/contingency matters, or non-billable administrative work.
Hold  
  • Check this box to place the timecard on hold.
  • The next time you invoice your matter, this item will not be included.
  • When you are ready to bill for it, edit the timecard and un-check this box to free it for billing.
  • Tip: On the time/expense tab you can use the filters (on the right) to show items on hold.
Flag  
  • You can flag the timecard with a priority billing level.
  • This assigns a red (critical), green (normal), or blue (low) flag next to the item on the time/expense grid.
NOTES TAB
Notes  
  • Internal only
  • Do not display on the invoice
  • There is a limit of 2,048 characters
TAX TAB
Taxable Setting Unchecked
  • If this setting is unchecked, no tax will apply to this entry.
  Checked
  • If this setting is checked, you can review the rates applied to this entry (as determined by the matter setting) and can make changes if needed. These changes will only apply to this entry.

Documents Section

In this section, you can attach any documents to support the activity you are logging. These documents will be accessible on the timecard itself, as well as within the matters document section. These documents will not be visible to the client unless shared in the client portal.
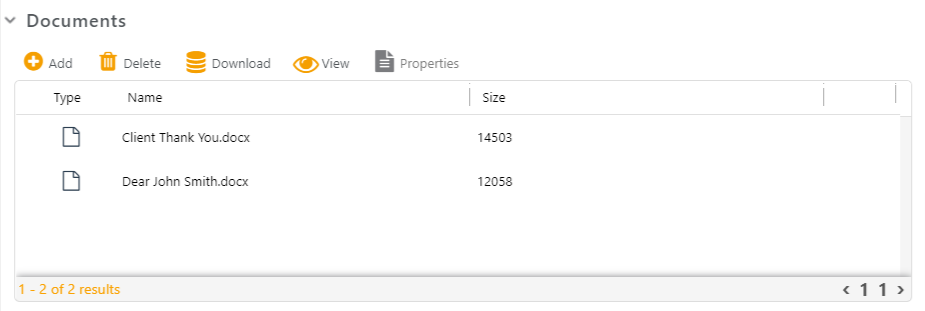
Add

Add a supporting document to this timecard.

All documents added to a timecard display under the matter’s Documents tab. 

The system creates a folder named @Timecards under Internal Documents.

Delete

Delete a supporting document from this timecard.

Download

Download a supporting document to your computer. 

View

When referring back to the timecard, you can view PDF and image files.

Properties

Select the document, then choose Properties to complete searchable criteria.

Save Options

Save and New

Click Save and New to save the timecard and enter another timecard right away. Helpful for bulk entry.

Save

Click Save to save the timecard and return to the Time/Expense screen.

Updated on August 5, 2021

Was this article helpful?

Related Articles

Need Support?
Can't find the answer you're looking for?
Contact Support