You created your matters. You entered your time, or your expenses, or both.
If it is a fixed fee or contingency matter, you recorded your fee.
You are ready to invoice your clients.
You generate individual invoices from Matters and batch invoices from Activities.
Generate an Invoice
This process works best for:
- Firms dealing with contingency matters
- Firms dealing with flat fee matters
- Firms wanting to invoice a single client
From Matters (Individual Invoices)
From Matters, you can generate an invoice based on one or more time and expense cards for a single matter.
To generate an invoice:
- From the left navigation panel, click Matters.
- From the Matters screen, either double-click the matter, or single-click the matter to highlight it, then in the toolbar, click Details.
- From Matters left navigation, click Billing.
- From the tabs atop the Billing screen, click Invoice.
- From the toolbar atop the Invoice screen, click Create Invoice.
- In the upper left corner of the Add Invoice screen, the Enter Info section includes fields you can modify. For additional information about these fields, see Invoice Screen Field Descriptions.
- In the Select Time/Expense cards to Include section, check the boxes to the left of the entries you want to include. You can also click checked boxes to deselect entries you do not want to include, or click Edit… to the far right of an entry to edit it.
- In the Advanced Settings section, you have many options from which to choose. For additional information about these fields, see Invoice Screen Field Descriptions.
- Under the Documents section, add files you want to include with the invoice, if applicable (for internal purposes only).
- Click Generate.
The Invoice screen refreshes, displaying your invoice in the listing. Toward the far left of the row, the unlocked symbol is a reminder it can be edited. If you have attached files to the invoice, a paper clip icon displays on the far left of the row.
Once you generate your invoice, you can view it, print it, and email it directly to your client.
From Activities (Batch Invoicing)
From Activities, you can generate multiple invoices across multiple matters at once.
- From the left navigation panel, click Activities.
- From the Activities left navigation, click Invoices.
- From the toolbar atop the Invoices screen, click Create Invoice.
The Add Invoice screen opens, displaying matters with unbilled time and expense entries. - In the left panel, you can edit any field. Review fields descriptions in Invoice Screen Field Descriptions.
- On the far right of the Select Matters To Bill section, click the magnifying glass icon.
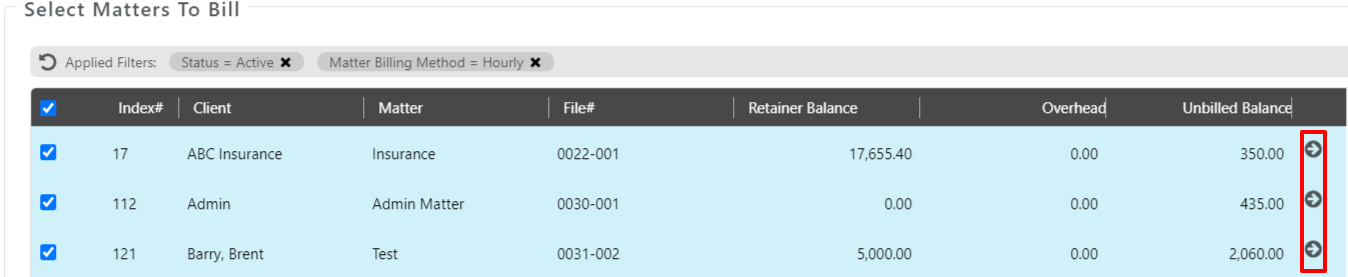
The Filter panel displays. - In the Matter Billing Method section, select Hourly, Fixed Fee, Contingency, or all three, as applicable.
The Select Matters To Bill listing refreshes. - In the upper right corner of the Filter panel, click X to close the panel.
- In the upper left corner of the Select Matters to Bill section next to the column heading Index#, click the check mark to deselect all matters, if desired, then check the boxes to the left of the matters you want to bill:

- To edit a time or expense card, if necessary:
- To the far right of its row, click the right arrow:
- To the far right of the card summary screen, click Edit…
- The card opens in edit mode.
- Make your changes.
- Click Save.
You return to the card summary screen. - In the upper left corner, click
 You return to your updated Add Invoice screen.
- To the far right of its row, click the right arrow:
- In the upper right corner of the Add Invoice screen, click Generate.
The Invoice screen refreshes, displaying your invoice in the listing. Toward the far left of the row, the unlocked symbol is a reminder it can be edited. If you have attached files to the invoice, a paper clip icon displays on the far left of the row.
Once you generate your invoice, you can view it, print it, and email it directly to your client.