You use the reconciliation feature to balance your books with your bank account.
CosmoLex recommends you reconcile your accounts monthly to catch bank or book errors in a timely manner.
This includes your:
- Operating account
- Trust account
- Credit card account
Watch a Video
Bank Reconciliation
Step 1: Create a Reconciliation Statement
To create your reconciliation statement:
- Confirm you have printed your checks for the account.
- From the left navigation panel, click Accounting.
- From atop the Accounting left navigation, click Bank.
- On the Bank Screen, either double-click the bank, or single-click it to highlight it, and then from the toolbar, click Details.
- From the bottom of the Bank Details left navigation, click Reconciliation.
- From the toolbar atop the Bank Reconciliation screen, click Add.
- On the Add New Bank Statement screen, from the Bank Statement End Date field’s drop-down, click your statement’s end date.
- In the Bank Ending Balance field, enter your statement’s bank ending balance.
- (For transactions you import via your bank’s QBO file or bank feed only) Check the Mark bank imported transaction as Clear as well as preserve clear status of excel imported transactions if any checkbox to automatically reconcile transactions with a Matched status and clear them from the applicable reconciliation statement, if desired.
- Click Save.
Step 2: Match Book Transactions to Your Bank Statement
To match your book transactions to your bank statement:
- Either double-click your reconciliation statement, or single-click it to highlight it, and then from the toolbar, click Details.
The Reconciliation Details screen opens, displaying a toolbar atop the screen.
- Check the boxes to the left of all deposits matching items from your bank statement. The total count and amount of the selected transactions will display in the box. If your bank batches checks or credit card payments received from clients, you may need to create a deposit slip.
- Click the checkbox to the left of all payments matching transactions from your bank statement.

- Click Clear Selected.
Deposit: The system marks your checked deposits as cleared and updates the cleared deposits Amount on the left of the screen.
Payment: The system marks the checked payments as cleared and updates the cleared payments amount on the left of the screen. - If you select transactions and exit without reconciling, the system will prompt you to choose to:
- Clear selected items, then exit – This will clear all the transactions selected in Deposit and Payment Tab and exit the reconciliation screen
- Exit without clearing selected items – You will exit the reconciliation screen without saving or clearing selections
- Return to reconciliation – This will close the message and you will remain on the reconciliation screen

Step 3: Reconcile Your Bank Account
-
- Take the appropriate action:
- Difference Does Not Equal $0
- Review your cleared deposits and payments for items cleared in error, items not cleared in error, items cleared despite entry errors, or entries omitted.
- Use the toolbar to make corrections as needed.
Add - Deposit tab
- Deposit: System will open an Add Transaction page to make a deposit entry you may have omitted.
- Invoice Payment: You can make a payment on invoice using check or cash option only.
- Payment tab
- Withdrawal: System will open an Add Transaction page to make a withdrawal entry you may have omitted.
Edit - Select an entry and click edit from the toolbar to open the Transaction screen.
- You can edit the date, amount and other details on the Edit Transaction screen.
Delete - Select an entry and click delete from the toolbar to delete an entry made in error.
Action - Deposit tab
- Create Deposit Slip: Use this function to create a deposit slip.
- Void Transaction: To void a transaction, select a transaction and click on Void Transaction.
- Payment Tab
- Void Transaction: To void a transaction, select a transaction and click on Void Transaction.
- Deposit tab
-
- Difference Equals $0
- Difference Does Not Equal $0
- Toward the upper left of the screen, click Reconcile.
The system reconciles your statement.
- Take the appropriate action:
Automated Clearing Feature
CosmoLex can automatically match your book transactions to your bank’s downloaded QBO statement and identify items ready to be cleared.
To automatically clear your matched items:
- From the left navigation panel, click Accounting.
- From atop the Accounting left navigation, click Bank.
- On the Bank Screen, either double-click the statement, or single-click it to highlight it, and then from the toolbar, click Details.
- Toward the upper left of the Bank Details screen, click the orange Import Transactions down arrow.
The Import bank statement .qbo file browser box opens.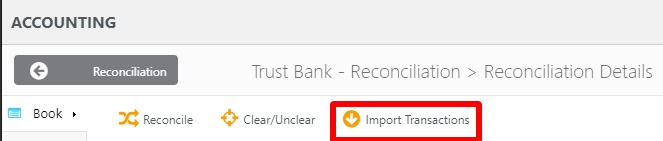
- Click Choose File.
- Locate your export file on your system.
- Either double-click the file, or single-click it to highlight it, and then click Open.
- The file name populates the browser box field.
- Click Upload.
The statement uploads, displaying your transactions in a new Bank tab beneath the Book tab.
| Book |
|
|---|---|
| Bank |
|
- Clear matched transactions as appropriate:
-
- Click Clear All
- In the upper left corner of the screen, click the orange Clear All.
- The clear all deposits message box reads: This action will mark ALL deposit transactions of the current reconciliation period as “Cleared.” This action cannot be cancelled. Continue?
The system clears the matched transactions.
- Click Clear Selected
- Check the boxes beside items you want to clear.
- Click Clear Selected.
The system clears the selections transactions.
- Click Items With Checkmarks in the Cleared Column
- Click items with checkmarks in the Cleared column.
The system clears the items.
- Click items with checkmarks in the Cleared column.
- Click Clear All
View a Matched Transaction’s Details
To view a matched transaction’s details:
- To the right of a transaction, click Details.
The Match Details screen opens, displaying the bank transaction to which the book transaction is linked. - If you think a bank transaction is incorrectly matched to a book transaction, un-check the bank transaction.
The transaction will remain uncleared.
Reconciliation Reports
To confirm your account reconciliations, see: