If you are using CosmoLexPay or the LawPay integration, you can now create a global payment link per bank account. This link can be embedded in your Law Firm’s website to accept online payments from your firm’s clients, or used in Email signatures.
Generate a Payment Link
To get the payment link, make sure your CosmoLex bank account is mapped with either CosmoLexPay or your LawPay account.
- From the left navigation panel, click Accounting.
- From the list of Banks that displays, select the bank for which you want a payment link.
- To the right of the selected bank row, click the orange Details icon.
- On the Bank Account Details screen that opens, scroll down to Website Payment Link and turn the toggle button ON.
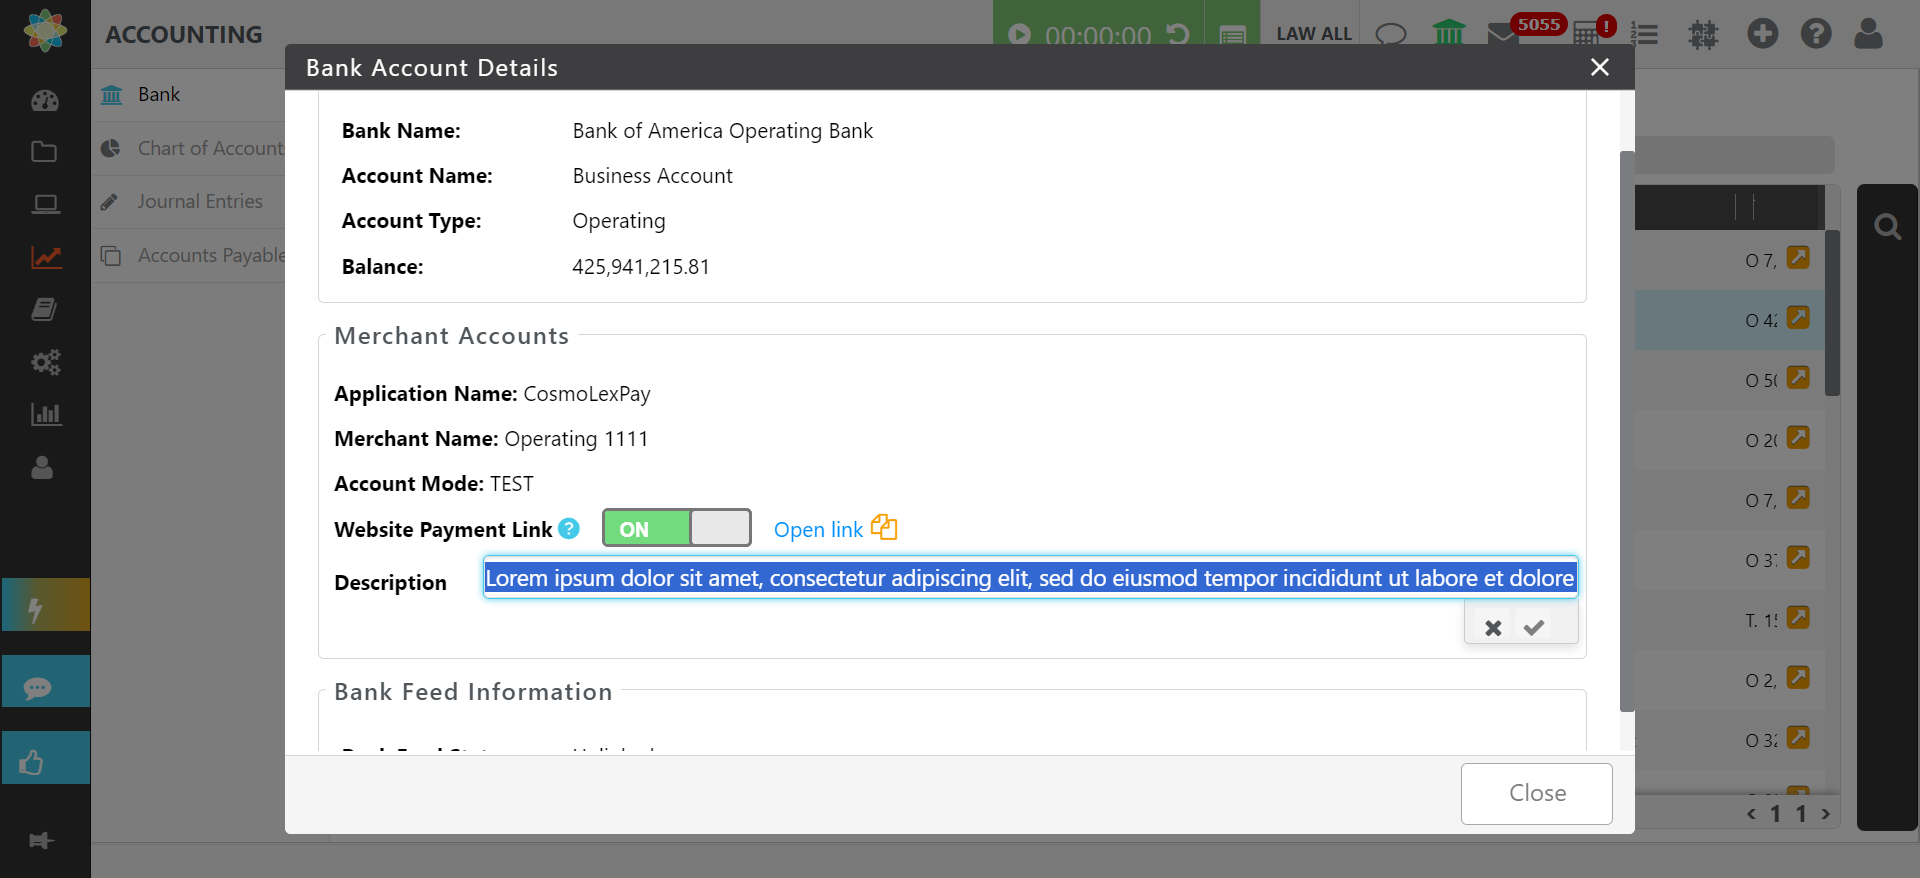
- In the Description field, add a description, if you desire. This description will appear beneath the firm information on the left of the Payment page.

- Once you have enabled the Website Payment Link, a specific payment link will be created for this merchant account. To copy the link, click on the Copy icon.
- You can now embed this copied link in your Law Firm’s website or an email. To receive funds separately in your Trust and Operating accounts, you can embed separate links for each account.
- To disable the link, you can turn off the Website Payment Link toggle, under Bank Details.
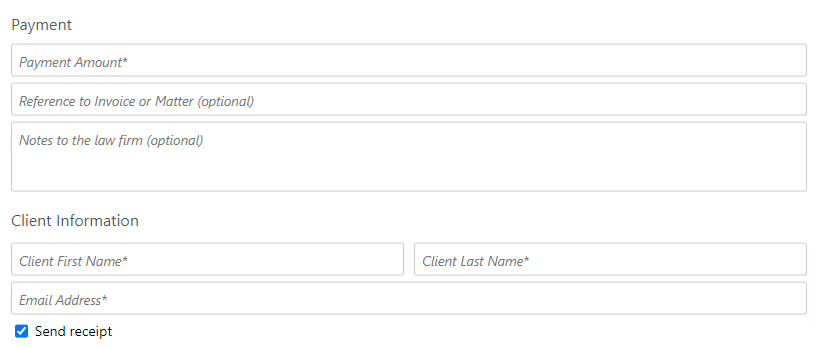
Making Payment Using the Payment Link
To make payments, click on the Payment Link. Complete the fields on the payment screen by filling in the required details.
Managing Transactions Linked to Embedded Payment Link
While receiving payments using a Website Payment Link is an added convenience for your client, taking the additional step of associating these payments to their matters is critical. In CosmoLex, we provide an area to view payments received to this link but not associated to a matter.
To confirm that your firm has received the payments:
- From the left navigation panel, click Accounting.
- From atop the Accounting left navigation, click Banks.
- From the list of Banks, either double-click the bank or single click it to highlight and from the toolbar, click Details.
- At the bottom of the bank’s left navigation, click on Website Payments.
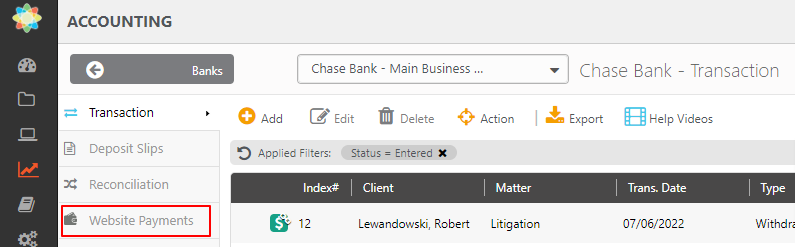
This will open a list of payments made into the account using the Website Payment Link.
Link Website Payments
Operating Bank Payments
You can link each payment in the Operating Account to Invoice Payment or Retainer. You can choose to delete a payment or Export the list. You can also use the magnifying glass filter icon on the right to search for a particular payment.
To link a payment to a Matter:
- Follow the steps above to open a list of payments in your Operating Account.
- Select a payment from the list by clicking on it.
- From the tabs atop the screen, click Link Payment.
- From the drop-down, select Invoice Payment or Retainer.

- If you have selected Invoice Payment, follow the steps below:
- A Link Payment screen will open. The Funds Received From section will pre-populate with the details of the payment, including the Date and Payor Name.
- In the Enter Client field, enter the name of the client to whom you want to link this payment.
- From the list of unpaid invoices that display, select the invoice to which you wish to link this payment.
- In the Summary section, the Payment Received field, is pre-populated with the payment amount. When you select an invoice, the Applied Amount field will populate with the amount of the invoice.
- Once you have selected the invoice(s) to which you wish to link the payment, click Link Payment. To exit without linking the payment, click Cancel.
- If you have selected Retainer, follow the steps below:
- A Receive Retainer – Operating screen will open. The Bank, Date, Amount, and Payor fields will pre-populate with the details of the payment.
- In the Client Matter field, when you enter the first few letters of the name, a drop-down will display a list of matters. Click to select the appropriate matter.
- In the Memo field, select a memo from the drop-down or enter your own.
- In the Memo 2 field, you can choose to add any additional information.
- The Split area will populate with the Client General Retainer (Operating)(Current Liability) COA. Once satisfied with the transaction, click Link Payment. To exit without linking the payment, click Cancel.
- If you have selected Invoice Payment, follow the steps below:
Trust Bank Payments
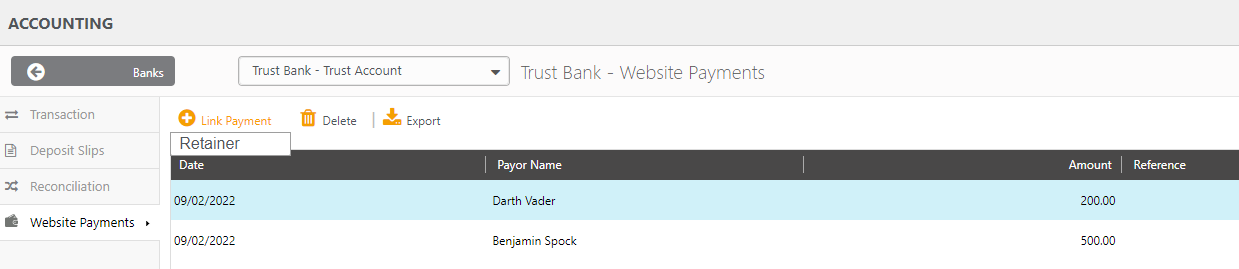
To link a payment to a Matter:
- Follow the steps above to open a list of payments in your Trust Account.
- Select a payment from the list by clicking on it.
- From the tabs atop the screen, click Link Payment.
- From the drop-down, select Retainer.
- On the Receive Retainer – Trust screen, the Bank, Date, Amount, and Payor fields will pre-populate with the details of the payment.
- In the Client Matter field, when you enter the first few letters of the name, a drop-down will display a list of matters. Click to select the appropriate matter.
- In the Memo field, select a memo from the drop-down or enter your own.
- In the Memo 2 field, you can choose to add any additional information.
- The Split area will populate with the Client Trust Funds (Current Liability) COA. Once satisfied with the transaction, click Link Payment. To exit without linking the payment, click Cancel.