CosmoLex comes built-in with a number of different invoice templates. This article outlines the steps you will have to take to edit, customize, or create any number of templates in the system. If you need further assistance, please call support (US: 732-595-9015; Canada: 365-804-0050), or submit a support ticket via email.
Customizing allows you to do the following to your invoice and cover page templates:
- Edit existing/Rename
- Create new
- Create a Cover Page
- Delete
View Invoice Templates
- From the navigation panel, click Setup.
- From the Setup gray left navigation, click Firm Settings.
- From the tabs atop the Firm Settings screen, select Invoice Settings.
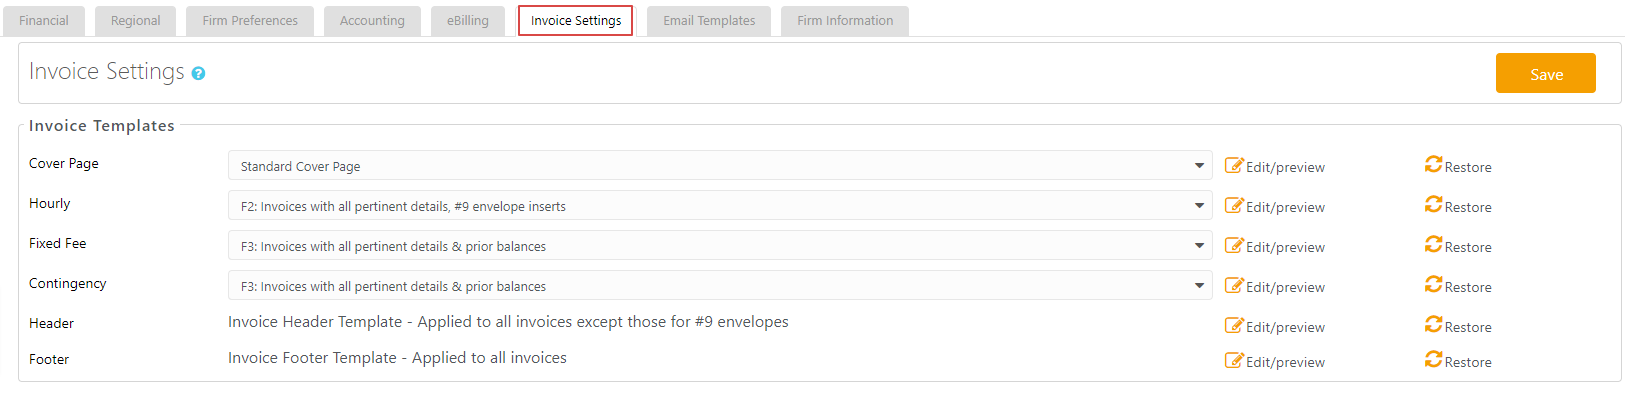
In the Invoice Settings section, you will have the option to customize:
Cover Page: A page that will precede the invoice
Hourly: Template for your hourly billed matters
Fixed Fee: Template for your fixed fee billed matters
Contingency: Template for your contingency billed matters
Header: Information that will appear on the top of all pages of the invoice
Footer: Information that will appear on the bottom of all pages of the invoice
Edit/Rename Invoice Templates
- From the drop-down, select the invoice template that you wish to edit.
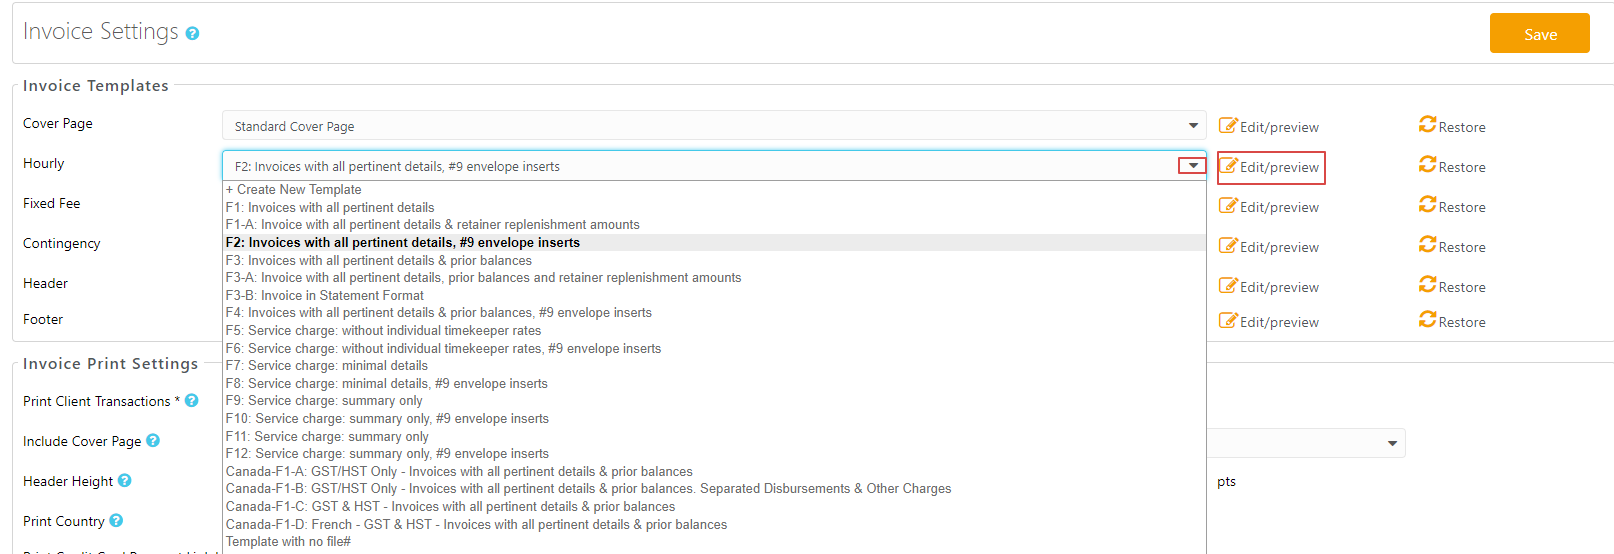
- Once you have selected the template, click Edit/preview.
- A message will then populate stating Changes must be made carefully and saved using the toolbar. To continue click OK.
- On the Edit Invoice Template screen, you can delete certain items, add merge fields, or use the toolbar to make changes.
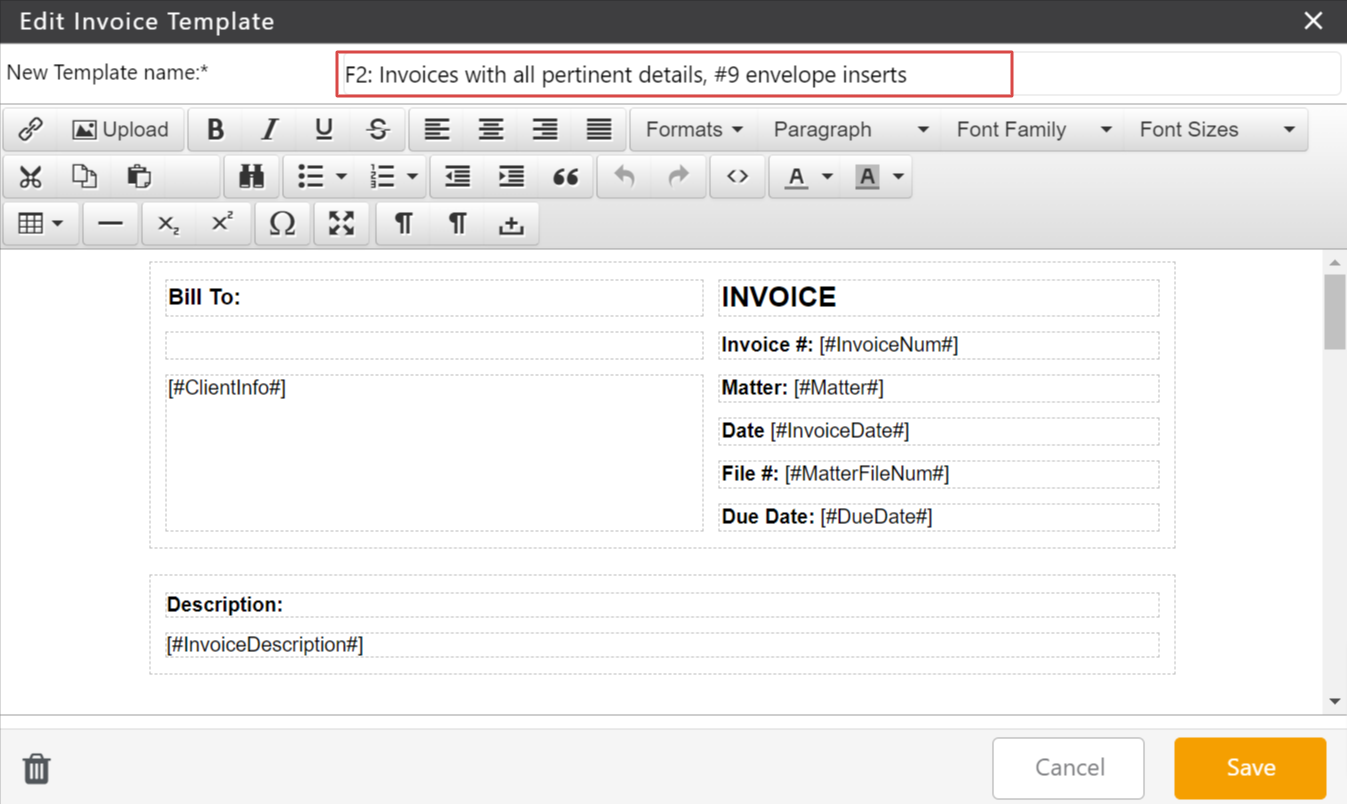
- When done editing the template, you can enter a new template name or keep the current name and click Save.
- If you find any errors, you can click Restore to the right of the template to revert to the original format. All changes will be erased.

Upload Images
- In the edit invoice template, click Upload in the gray bar.

- After you choose a file, you can crop the image on the page.
Add a Page Break
To add a page break to any of your invoices:
- From the list of Invoice templates, select the template to which you wish to add a page break and click Edit/preview.
- A message will then populate stating “Changes must be made carefully and saved using the toolbar.”
Click OK to continue. - From the toolbar on the Edit Invoice page that opens, click on source code (<>).
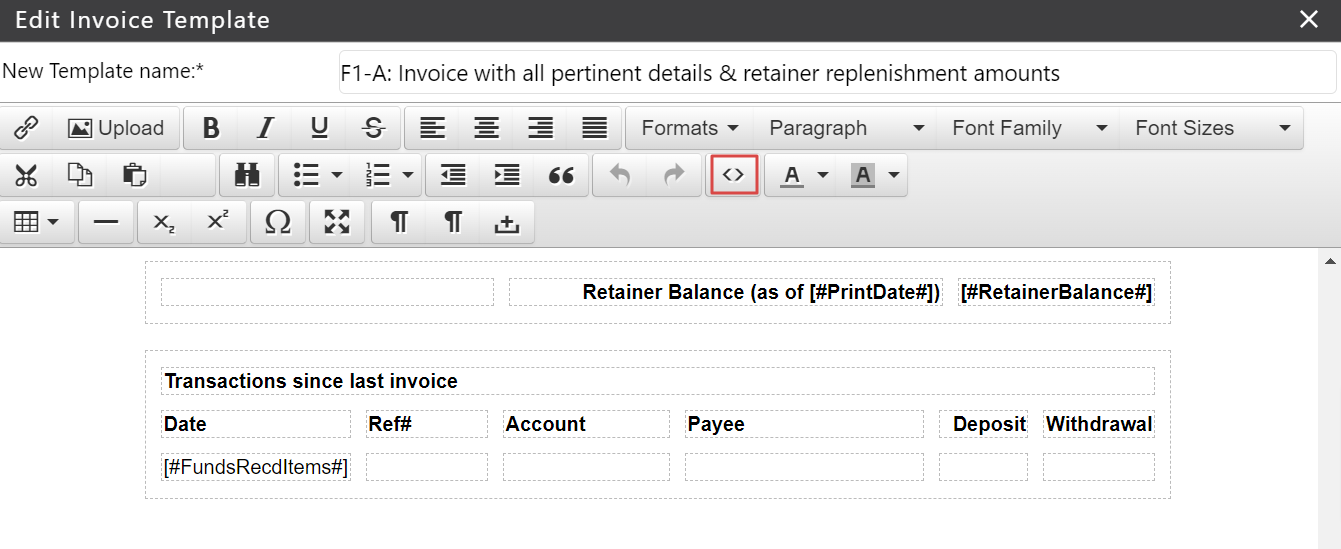
- On the Source code pop up page, right before where you want a new page to start, insert the following code by copying and pasting it:
- Once you are satisfied that your page break is in the correct place, click OK. All your future invoices will include a page break where you added it.
In addition to adding or removing invoice template fields, you can also create your own invoice template. Before creating your invoice template, take a look at our listing of available invoice and letter template fields.
Create New Invoice Template
To create a new invoice template:
- On the Invoice Settings screen, in the Invoice Templates section, use the arrow in the field beside Hourly, Fixed Fee, or Contingency, to select where you want to create a new template.
- From the drop-down, click + Create New Template.
- On the Create New Template screen, you have the option to:
- Select Template from Library: Select a system defined template from the library and modify it according to your requirements.
- Duplicate Existing Template: Select an existing template and make changes to it.
- Create New Template from Scratch: Use a blank template to create your own invoice template.
Select Template From Library
This option is currently available for Hourly matters only. We currently do not have a template library for fixed fee and contingency matters.
To select a template from the library:
- Use the steps to create a new template.
- On the Create New Template screen, choose Select Template from Library and click Next.
- From the library of available templates, select a template and click View.
- If you are certain you wish to modify this template, click Close.
- With the template still selected, click Apply.
- On the Create Invoice Template page, enter the template name.
- Once you have made modifications to the template, click Save.
Your template will be saved and will appear in the drop-down.
Duplicate Existing Template
To duplicate an existing template:
- Use the steps to create a new template.
- On the Create New Template screen, choose Duplicate Existing Template and click Next.
- On the Create Invoice Template page, from the list of templates in the Select existing templates drop-down, click to choose a template.
- In the New Template Name field, enter the template name.
- Once you have made modifications to the template, click Save.
Your template will be saved and will appear in the drop-down.
Create New Template From Scratch
To create a new template from scratch:
- Use the steps to create a new template.
- On the Create New Template screen, choose Create New Template From Scratch and click Next.
- On the Create Invoice Template page, in the New Template Name field, enter the template name.
- You can copy each field name from Invoices and Letter Template Fields and paste it into the desired location in your template.
- Once you have created the new invoice template, click Save.
Your template will be saved and will appear in the drop-down.
Create a Cover Page
To create a cover page for your invoice template:
- On the Invoice Settings screen, in the Invoice Templates section, use the drop-down arrow to either edit a system defined cover page or click + Create New Template.
- This will give you the option to:
-
- Duplicate Existing Template: Select an existing template and make changes to it.
- Create New Template from Scratch: Use a blank template to create your own invoice template.
-
Duplicate Existing Template
To duplicate an existing template:
- On the screen, choose Duplicate Existing Template and click Next.
- On the Create Invoice Template page, from the list of cover page templates in the Select existing templates drop-down, click to choose a template.
- In the New Template Name field, enter the template name.
- Once you have made modifications to the template, click Save.
Your template will be saved and will appear in the drop-down.
Create New Template From Scratch
To create a new template from scratch:
- On the screen, choose Create New Template From Scratch and click Next.
- On the Create Invoice Template page, in the New Template Name field, enter the template name.
- You can copy each field name from Invoices and Letter Template Fields and paste it into the desired location in your template.
- Once you have created the new invoice cover page template, click Save.
Your template will be saved and will appear in the drop-down.
Delete an Invoice Template
To delete an invoice template or a cover page template:
- On the Invoice Settings screen, in the Invoice Templates section, use the arrow in the field beside the area from which you want to select the template you wish to delete.
- Once you have selected the template, click Edit/preview.
- A message will then populate stating “Changes must be made carefully and saved using the toolbar.”
Click OK to continue. - On the Edit Invoice Template screen, confirm that you have selected the correct template in the New template box, then in the bottom left of the template, click on the delete icon.
- The message pop-up will read, Delete successful. Click OK.