Your dashboards are the first thing you see when you log in to your CosmoLex account.
Your ability to view dashboards depends on your user access.
CosmoLex has three dashboards:
| Firm Dashboard |
|
|---|---|
| Me Dashboard |
|
| Recent Activities |
|
Watch a Video
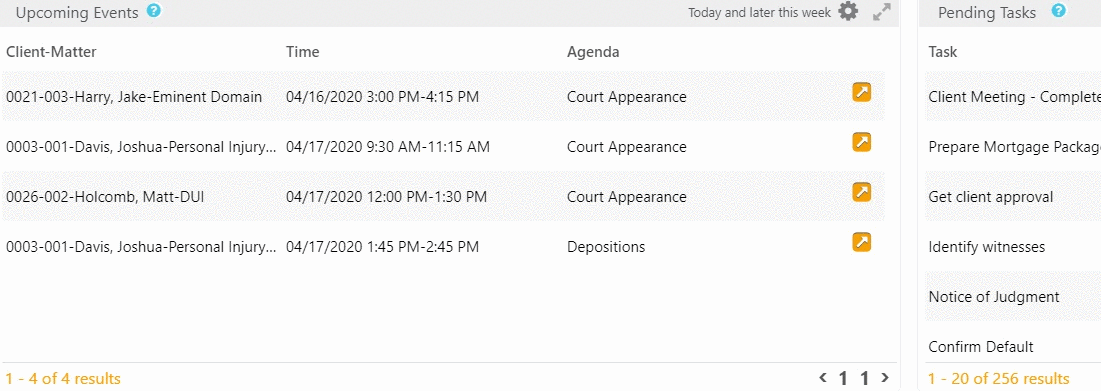
Upcoming Events
The dashboard’s top left section lists your upcoming events based on their due date. You can click the gear icon to change the date range, or click the orange arrow icon to the right of an event to edit the event.
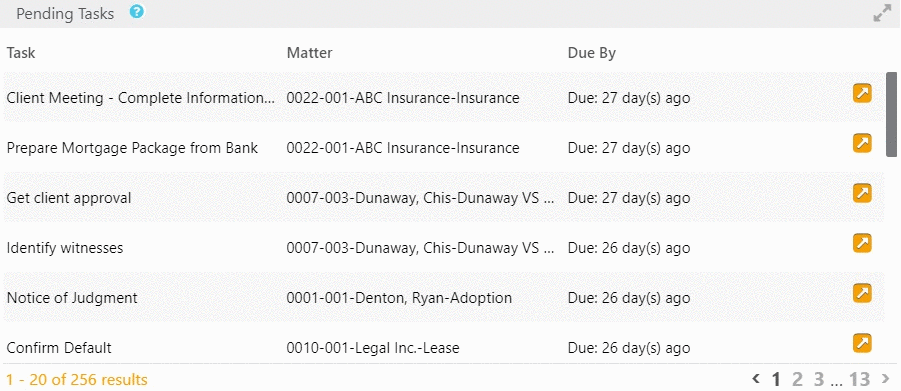
Pending Tasks
The dashboard’s top right section lists your pending tasks based on due date. On the far right, you can click the orange arrow icon to either edit a task, or mark it complete.
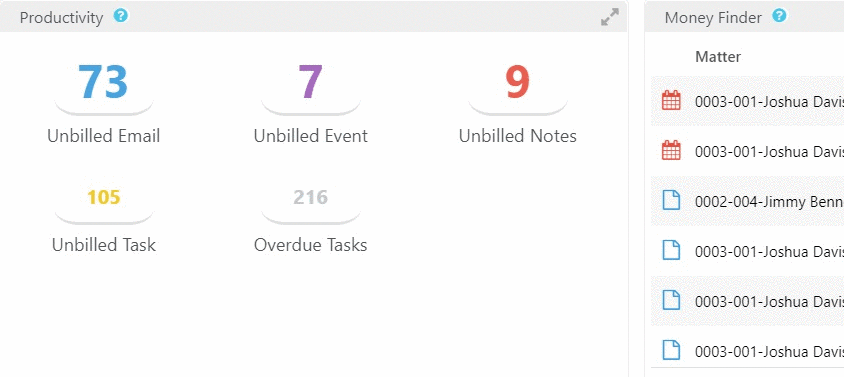
Productivity
This lower left section provides counts related to unbilled, unpaid, and overdue items.
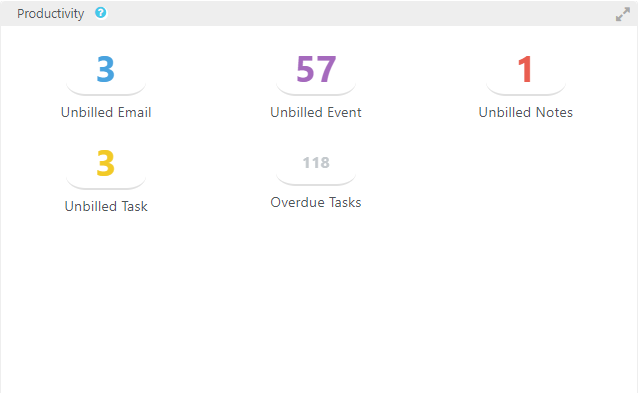
Unbilled Emails
When you receive emails in CosmoLex, you can mark them as Billable items. Once marked Billable, the emails will display in this list: emails you can invoice, but for which no time entry exists.
Click Unbilled Email to view a list of your firm’s unbilled emails. To the far right of an unbilled email, click the orange arrow icon to add a timecard to the email, removing it from Unbilled status and preparing it for inclusion on your next invoice.

Unbilled Events, Notes, and Tasks
These three items work the same as Unbilled email, with one exception: clicking the orange arrow icon not only lets you add a timecard, you can also edit an event.
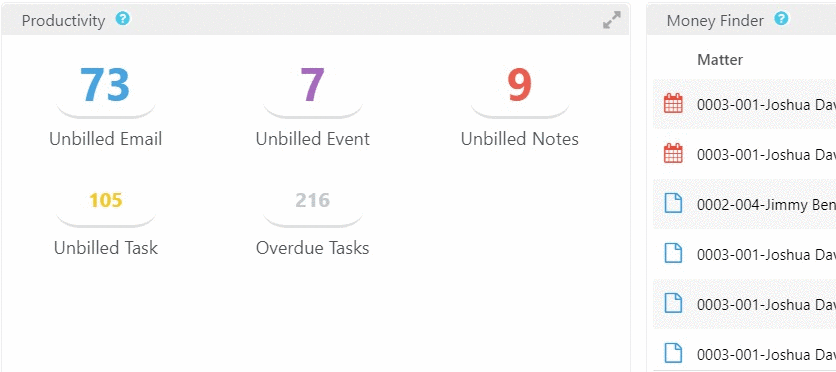
Overdue Tasks
The Overdue Tasks icon displays a list of overdue tasks. Using the orange arrow icon, you can either edit the task or mark it complete.
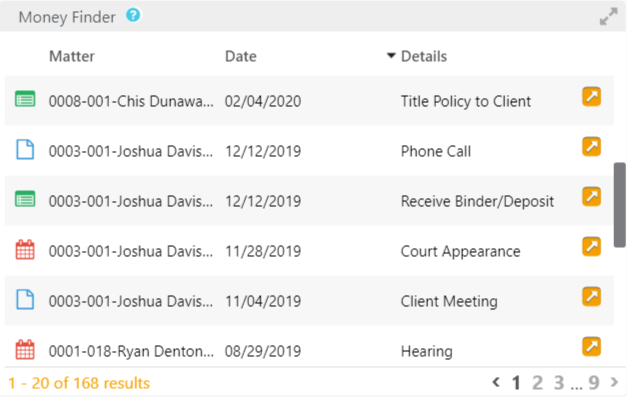
Money Finder
This lower middle section lists the user’s unbilled, but Billable items.
These items can include emails, tasks, notes or calendar events. While the Firm Dashboard displays a firm-wide Money Finder list, the Me Dashboard displays only the user’s Billable items.
Items that will display in the Money Finder are those that you mark as Billable when you create them, or edit the item to change its Billing status to Billable.
Once your items display in the Money Finder, you can enter time from your Dashboard, reducing the possibility of overlooking billable time.
Add Time from the Money Finder
To add time from the Money Finder:
- Locate your billable item on the Money Finder list.
- To the item’s far right, click the orange arrow icon.
- From the drop-down, click Add Time.
- On the Add Timecard screen, complete the fields.
- Click Save.
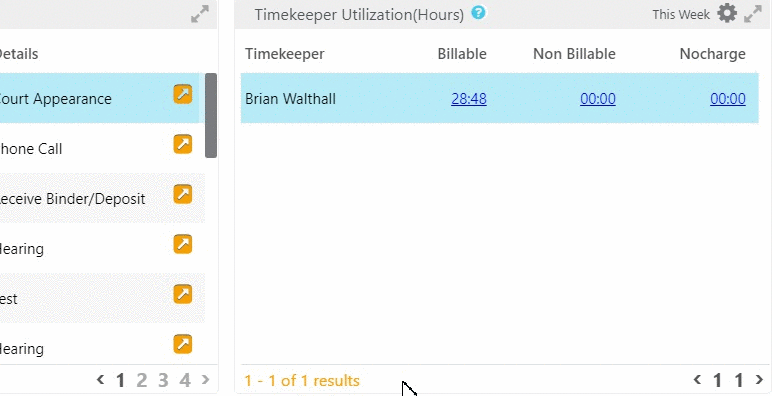
Timekeeper Utilization
In this lower right section, you can view your Billable, Non Billable, and No Charge hours. Click the gear icon to change the date range.
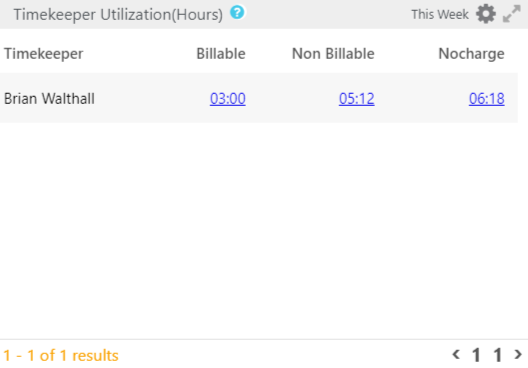
View Time Entries From Timekeeper Utilization
To view individual time entries:
- Beside the timekeeper’s name, click either the Billable, Non Billable, or No Charge field’s value.
The applicable screen opens, displaying all time entries for that billing category. - Click the orange arrow icon to edit the time entries, if desired.