Secure File Sharing

CosmoLex users using LexShare as their default document storage application can not only use the LexShare Workspaces to store Client-Matter related documents, but also request signature, request files, and share files securely from within CosmoLex. 

Note

  • LexShare is currently available only in the US.
  • The integration works with a single LexShare account, so be sure to choose an account accessible to everyone who requires access in your firm.

Learn how to Integrate LexShare with CosmoLex

Access Documents

From Matters

  1. From the left navigation panel, click Matters.
  2. On the Matters screen, double-click a matter, or single-click it, then from the toolbar, click Details.
  3. From the Matters Details left navigation, click Documents.
    A folder taxonomy displays, with the documents stored in the highlighted folder, if any, listed in the panel to its right.  

Here you can add, download, rename folders and files, view image and pdf files and leave comments.

To the right of each file, you will see an Open in LexShare button. This will open this file within your LexShare portal.

From Activities

  1. From the left navigation panel, click Activities.
  2. From the Activities left navigation, click Documents.
    A folder taxonomy displays, with the documents stored in the highlighted folder, if any, listed in the panel to its right.  

Here you can add, download, rename folders and files, view image and pdf files and leave comments.

To the right of each file, you will see an Open in LexShare button. This will open this file within your LexShare portal.

Request Files

You can request files to be saved directly to a matters folder, using our LexShare integration.

  1. To create a folder, from the toolbar atop the documents page, click Add.
  2. From the drop-down, click Add Folder.
  3. On the Add Folder screen, enter the name for the folder and click on Create.
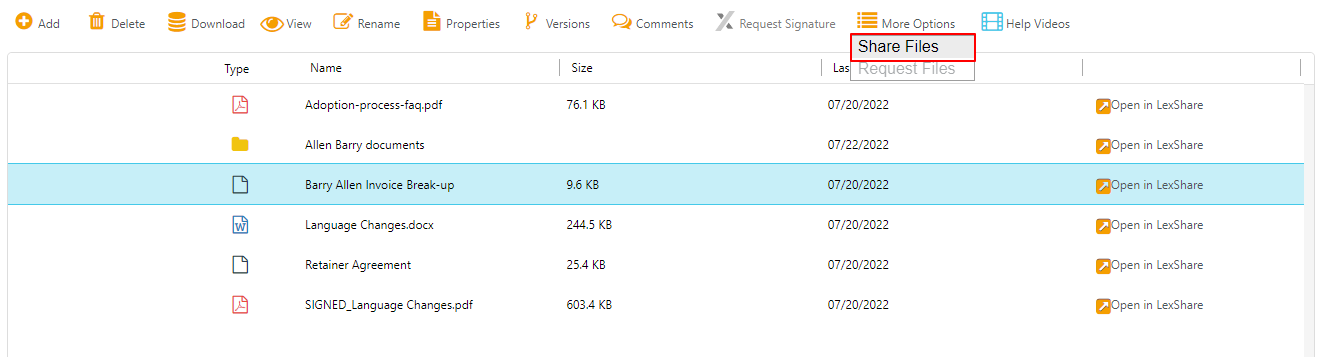
  4. To request files, click on the folder where you wish to receive the file. 
  5. From the toolbar atop the folder page, click More Options > Request Files. (If you do not see More Options in the toolbar, click the menu button.)
  6. Complete the fields on the LexShare Request Files page.

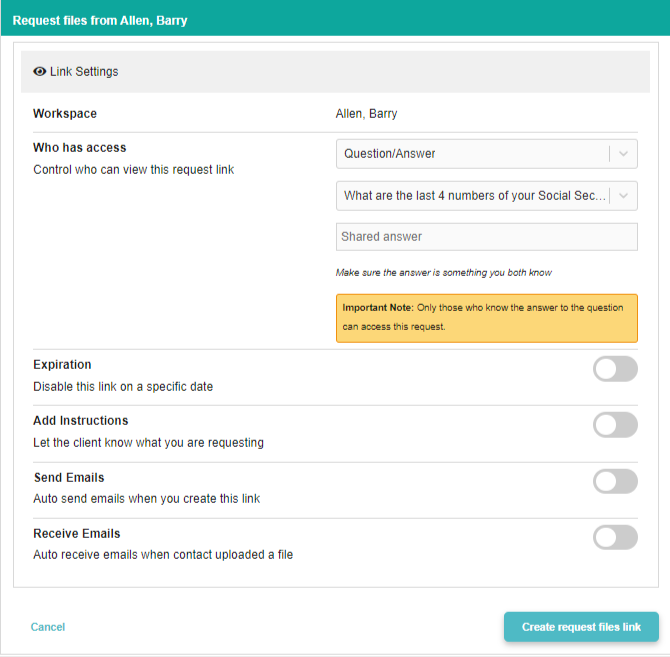
LexShare Request Files Page Fields

Workspace
  • The system populates this with your Matter.
Who has access
  • This allows you to control who can view the link.
  • From the drop-down, you can choose between Direct Link and Question/Answer.
  • If you select Question/Answer, a drop-down will display a list of questions. Select the question and enter its answer in the field below.
    Note

    Only those with the link who know the answer to the question can access the file request.

Expiration
  • After you turn the toggle button on, you can choose to disable the link on a specific date. 
  • Enter the date on which you would like the link to expire in the MM/DD/YYYY format.
Add Instructions
  • Turning this toggle button on, will display a text box.
  • Use the box to customize your instructions to the recipient of the file. This will display on the email.
Send Emails
  • Turning this toggle button on, will display a box to enter the recipient’s email address.
  • If you wish to send the email to more than one recipient, click on the Add recipient box.
Receive Emails
  • Turning this toggle button on, will display a box to enter the email address of the person in your firm who will get notified when the files have been uploaded by the client.
  • If you wish more than one person in your firm to get notified, click on the Add recipient box.
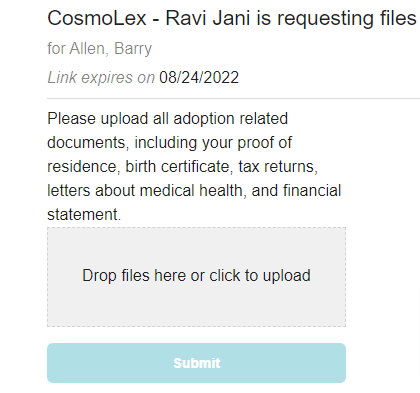
  1. Once complete, click Create request files link. Your client will receive an email with a link and any instructions you have entered to upload files.

Share Files

  1. To share files, on the documents page, click on the file you wish to share with your client.
    Note

    You cannot share folders but you can select one or more files to share.

  2. From the toolbar atop the folder page, click More Options > Share Files. (If you do not see More Options in the toolbar, click the menu button)
  3. Complete the fields on the LexShare Share Files page.

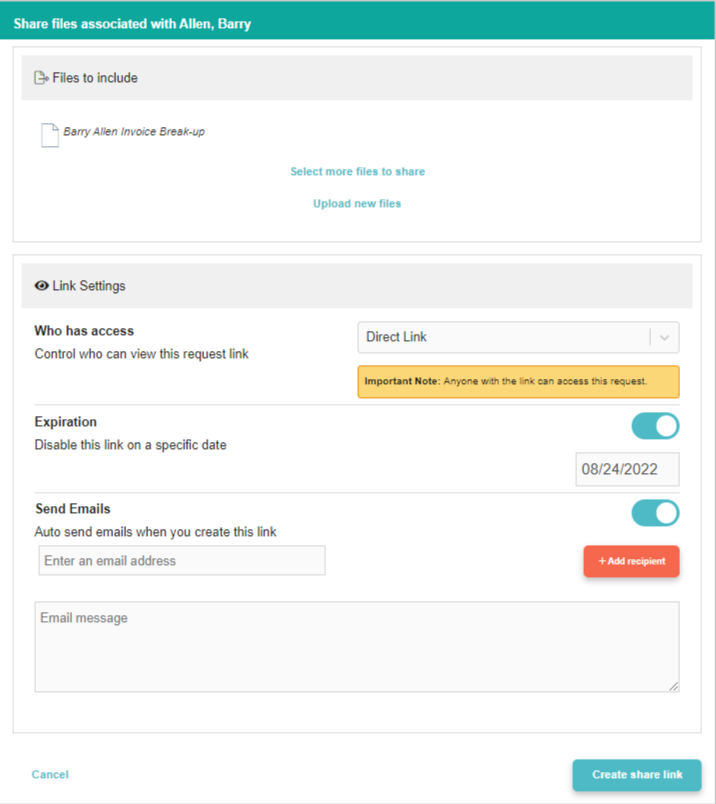
LexShare Share Files Page Fields

Files to Include
  • The system will include the file you selected
  • Select more files to share – You can choose this option to add more files from within your LexShare document application to share with your client
  • Upload new files – You can choose this option if you wish to share files saved elsewhere in your system
Who has access
  • This allows you to control who can view the request link.
  • From the drop-down, you can choose between Direct Link and Question/Answer.
  • If you select Question/Answer, a drop-down will display a list of questions. Select the question and enter its answer in the field below.
    Note

    Only those with the link who know the answer to the question can access the files shared by you.

Expiration
  • After you turn the toggle button on, you can choose to disable the link on a specific date. 
  • Enter the date on which you would like the link to expire in the MM/DD/YYYY format.
Send Emails
  • Turning this toggle button on, will display a box to enter the recipient’s email address.
  • If you wish to send the email to more than one recipient, click on the Add recipient box.
Email message
  • Use the box to enter any message you wish to send with your files.
  1. Once complete, click Create share link.

You can also use your LexShare integration to Request eSignature

Updated on July 27, 2022

Was this article helpful?

Related Articles

Need Support?
Can't find the answer you're looking for?
Contact Support