You can share forms with outside parties to collect and populate needed information.
If you have not yet created a form template, see Create an Intake Form Template.
Create A Form
- From the left navigation panel, click Activities.
- Within the Activities left navigation, click Intake Forms.
- From the toolbar atop the Intake Forms screen, click Add.
The Create Form screen opens.
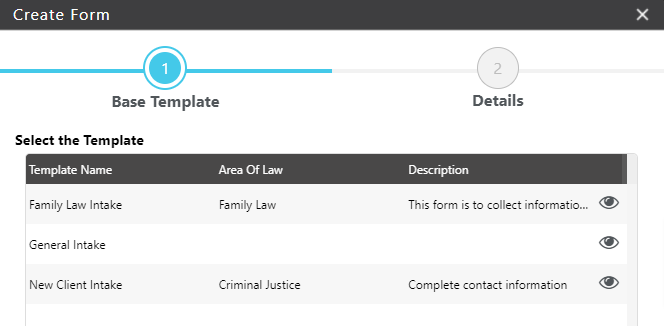
Select Template
You will see a list of all form templates which are not in draft, with columns that include Template Name, Area of Law and Description. To preview a template, click the view icon on the right.
- Select the template you would like to share with the outside party, then click Next.
Proceeds to the Details screen.
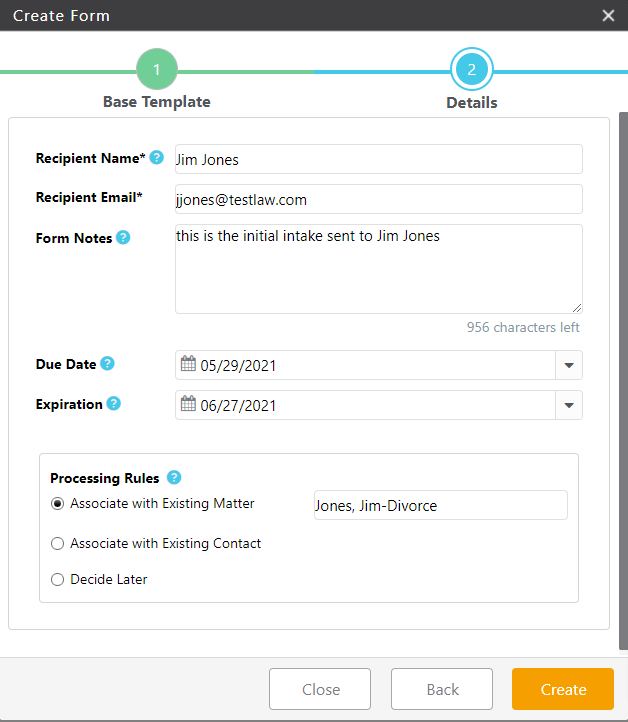
Complete Form Details
- Enter the Recipient’s First and Last Name or Entity. Recipient Name will be used to help you recognize the Intake Form.
- Confirm the Recipient’s email address.
- Enter any Form Notes. Entries in this area will not be visible to the recipient and are meant for internal use. Enter any information about the form that you would find helpful later in the engagement with the recipient or matter.
- Pick a Due Date. This requests that the recipient fill it out prior to the date entered. This will show on the email template sent to the recipient.
- Pick an Expiration Date. The recipient’s access to the form will expire after this date. This will also show on the email template sent to the recipient.
- Choose a Processing Rule.
Processing Rules: Select one of these options to automate importing the information from the form after it is completed by the outside party. You are only being asked for this information now for reference purposes and to control sharing via the client portal, when you choose to process a completed form, you will have the option to change this rule.
-
- Associate with Existing Matter. If selected, use the adjacent field to search for an existing matter. If you wish to share this form via the client portal, a matter must be chosen here.
- Associate with Existing Contact. If selected, use the adjacent field to search for an existing contact.
- Decide Later. You may not have a matter or contact to select and/or may want to make this decision later. When processing the completed form, you can then associate it with an existing matter or contact, or add a new one.
- Click Create at the bottom right.
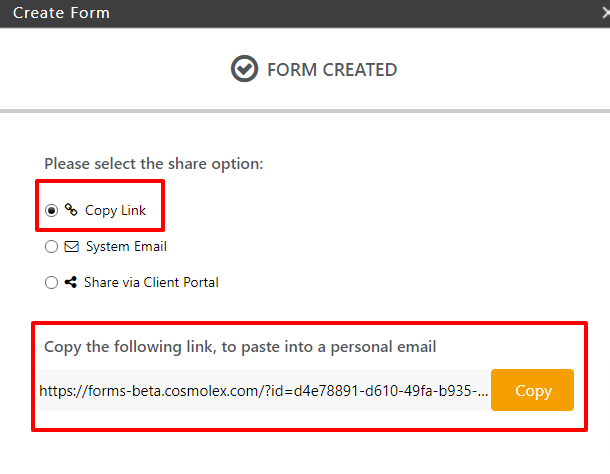
You will receive a confirmation that the form was created with steps to share the form.
Share A Form
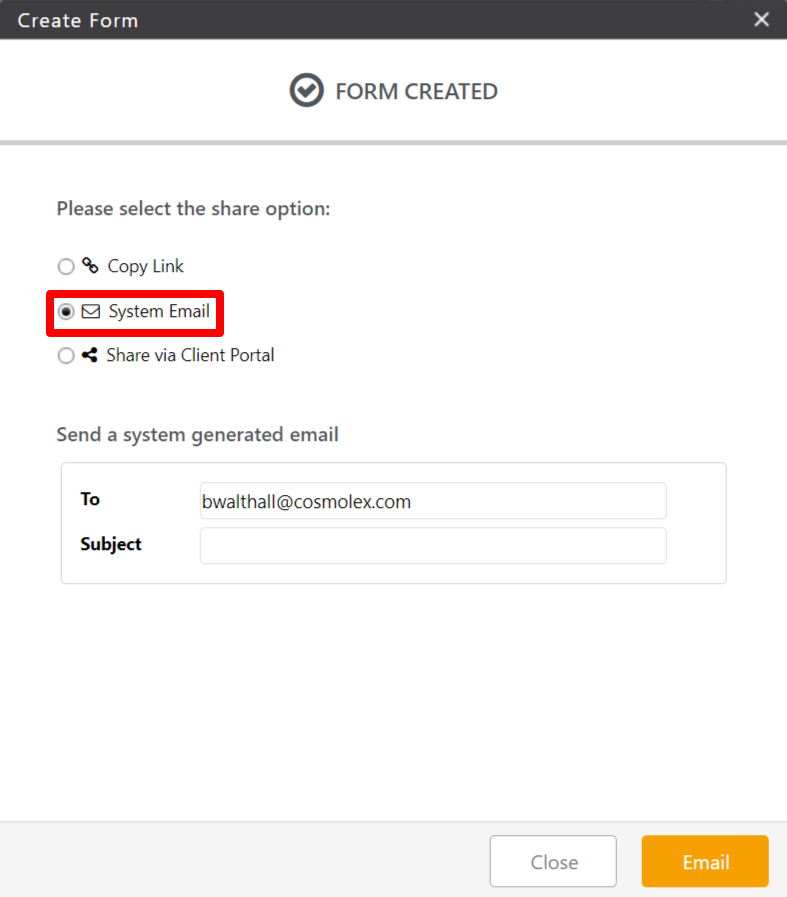
On that final screen, you have three options when sharing the Intake Form with the recipient:
Copy Link
You may wish to send the Intake Form to the recipient via a link outside of CosmoLex, such as including it in an already drafted email.
-
- Choose the Copy Link option.
- Next to the link provided, select Copy.
- The link is now automatically copied to your clipboard and can be pasted in the communication of your choosing.
System Email
You may wish to send the Intake Form as an email directly from your CosmoLex account.
-
- Choose System Email.
- Review the recipient’s email address. This will populate with the email address you entered on the first screen, but can change if need be.
- Enter a subject for the email.
- Select Email.
Via Client Portal
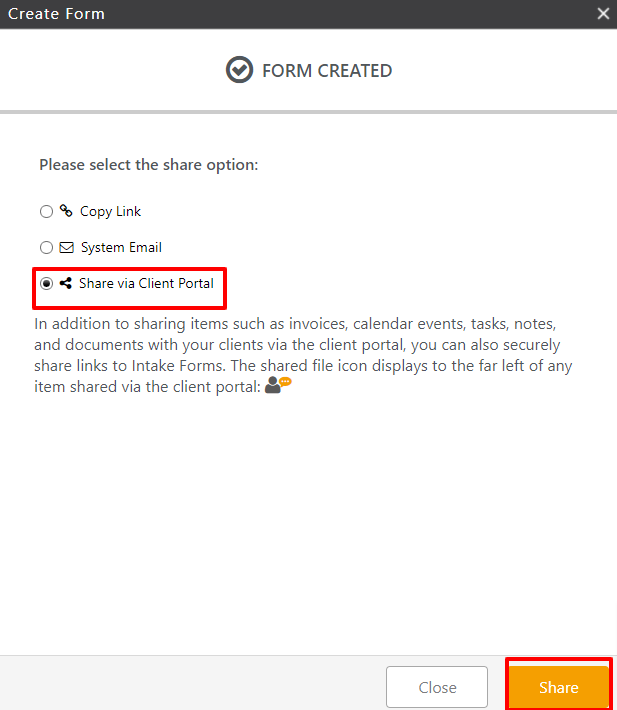
-
- Choose Share via Client Portal.
- Select Share.
The client will then be able to access the form from their portal by navigating to the top right of their client portal page.
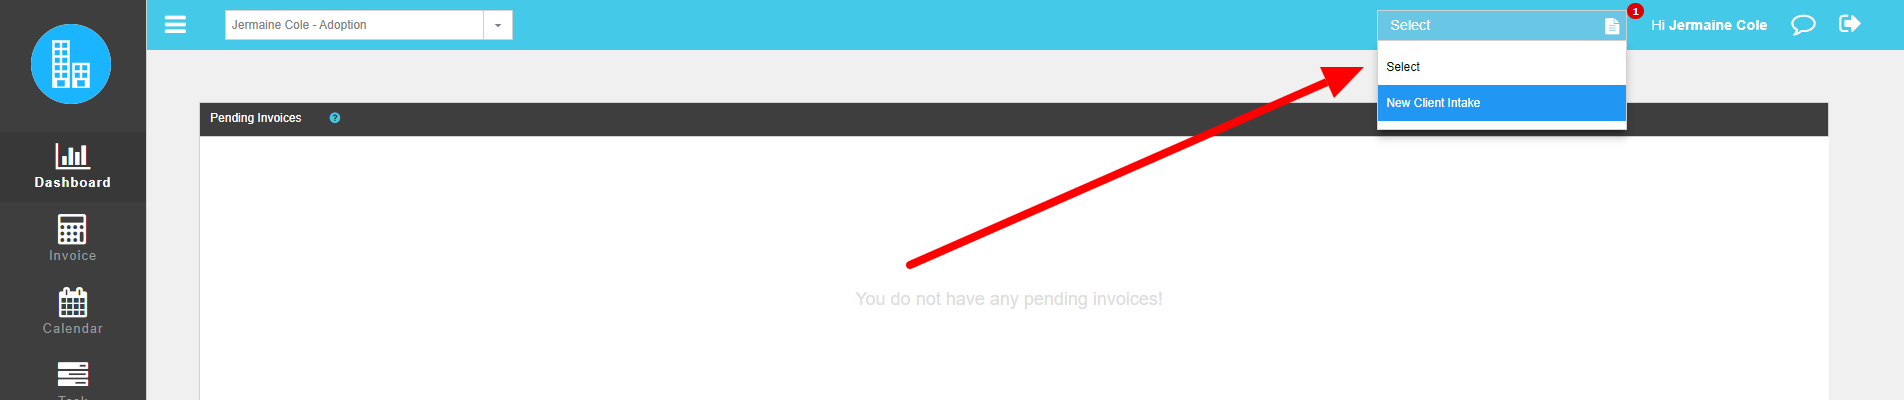
Once they select the form from the drop-down, they can begin filling it out and submit.
By using any of these share options, the form will now be listed with a status of![]()
Form Status
The first column in the intake form grid lists Status:
| Status | Definition |
| Created | This form has been created, but not shared. |
| Shared | This form has been shared with the recipient. |
| In Progress | The recipient has clicked the link and viewed/started the form but has not yet submitted. |
| Submitted | This form has been completed and submitted by the recipient. |
| Processed | This form has been processed. This means it has been associated with either a contact or matter, and respective fields have been populated with form data. |
Notifications
CosmoLex will automatically send out the following email notifications after sharing a form. Any notifications to the firm will be sent to the user that sent the form, and notifications to the contact will be sent to the email address provided when sharing the form.
Firm Email Notifications:
- When the Intake Form has been accessed
- When the Intake Form has been submitted
Contact Notifications
- When the Intake Form is available
- When the Intake Form has been accessed
- When the Intake Form has been submitted
You can view and edit these email notification templates under Setup > Firm Settings > Email Templates > Intake Forms. Learn more about editing email templates.
Other Form Options
View a Form
Once a form is created, you will have the ability to preview how the form will look.
- From the left navigation panel, click Activities.
- Within the Activities left navigation, click Intake Forms.
- From the toolbar atop the Intake Forms screen, click View Form.
A separate tab will open with a preview of the form.
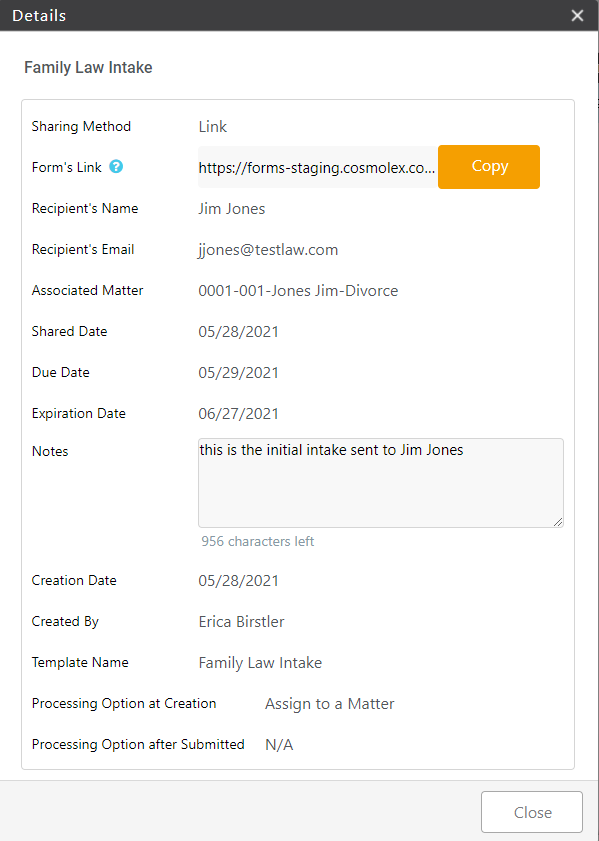
View Form Details
Once a form is created, you can click the orange details icon on the far right to view form details.

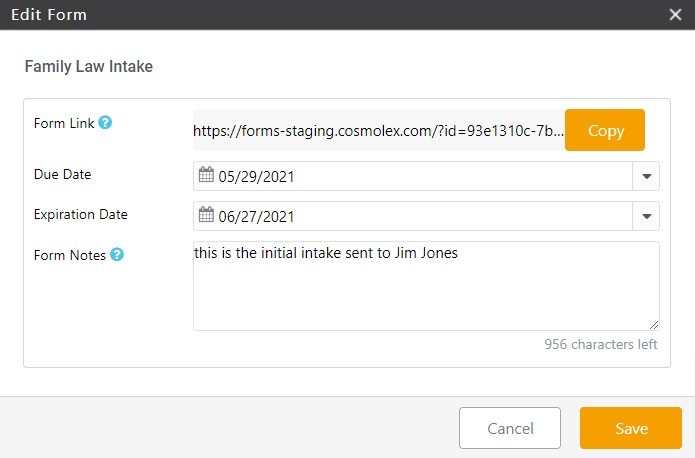
Edit a Form
Once a form is created, you have the option to edit limited information.
- From the left navigation panel, click Activities.
- Within the Activities left navigation, click Intake Forms.
- From the toolbar atop the Intake Forms screen, click Edit.
On the Edit Form screen, you have the option to copy the form link, change the due date, expiration date and internal form notes.
Delete a Form
Once a form is created, you have the option to delete it.
- From the left navigation panel, click Activities.
- Within the Activities left navigation, click Intake Forms.
- From the toolbar atop the Intake Forms screen, click Delete.
The Delete Form screen opens. with the message Are you sure you want to delete the selected Form Instance? - If you wish to delete this form select Yes, otherwise select No.
Once a form is submitted and you wish to process the data received, read Process an Intake Form.