CosmoLex’s Gmail email integration lets you auto-forward your incoming emails. For complete email record-keeping within CosmoLex, you can also manually forward your outgoing emails.
Auto-Forward Incoming Email
To auto-forward your incoming email:
- Setup email integration and permissions to ensure your account is ready for successful integration.
- Log in to Gmail.
- Navigate to Settings > Forwarding and POP/IMAP.
- Click Add a forwarding address.
- Paste the CosmoLex forwarding email address you obtained in step 1.

- Click Next.
An email is sent to your CosmoLex mailbox. It may take a few minutes to receive it. - In CosmoLex, take one of these actions:
- From Atop Any Screen
- Toward the upper right corner of the screen, click the envelope icon.
- From Activities
- From the left navigation panel, click Activities.
- From the Activities left navigation, click Emails.
- From Atop Any Screen
- Click Inbox.
- Click the email to view the verification code within it.
- Copy the verification code.
- In Gmail, navigate to Settings > Forwarding and POP/IMAP.
- Paste the code.
- Click Verify.

- In the Forwarding section’s drop-down, click the CosmoLex address.
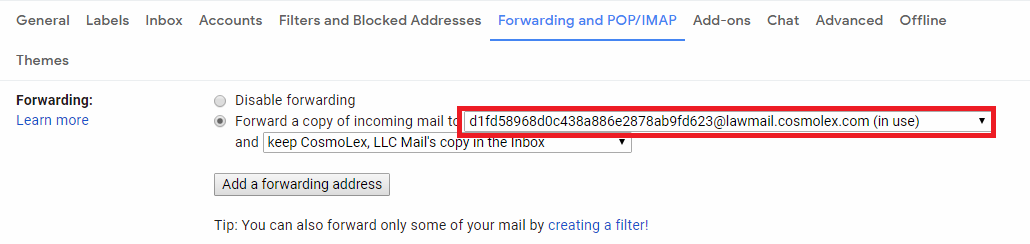
- At the bottom of the screen in the middle, click Save Changes.
Your incoming email will auto-forward to CosmoLex.
Auto-Forward Outgoing Gmail
To forward your outgoing Gmail to CosmoLex:
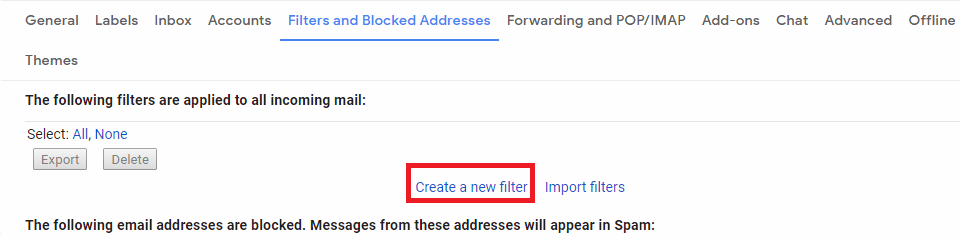
- Go to Settings > Filters and Blocked Addresses.
- Click Create a new filter.
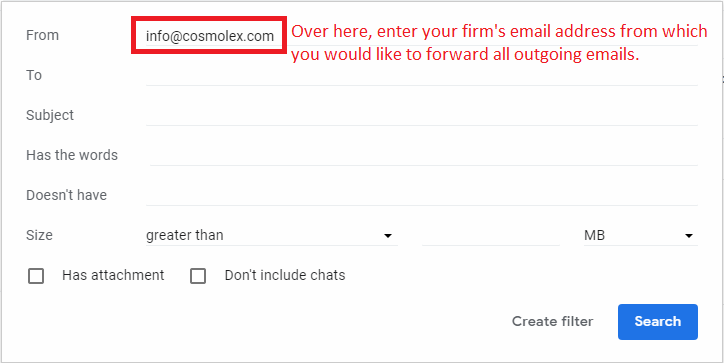
- Click Create filter with this search.
- In the From field, enter the firm email address to which you would like to forward your Gmail.
- Click Create filter.
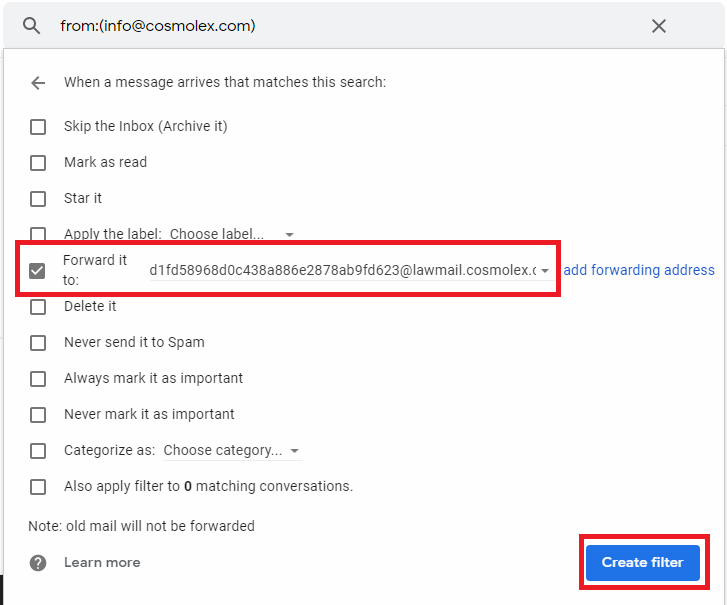
-
- From the Forward it to field’s drop-down, click the CosmoLex email address.
- Click Create Filter.