You can record, track, and mark firm bills paid through accounts payable.
Watch a Video
Add a New Bill
When you add a new bill, you have options such as:
- Holding bill payment
- Post as a matter expense
- Posting it to its corresponding General Ledger account for convenient payment recording and reporting purposes
To add a new bill:
- From the left navigation panel, click Accounting.
- From the bottom of the Accounting left navigation, click Accounts Payable.
- From the toolbar atop the Accounts Payable screen, click Add > Bill.
- On the Add New Bill screen, from the Bill Date field’s drop-down, click the bill date.
- In the Amount field, enter the bill amount.
- From the Due Date field’s drop-down, click the due date.
- In the Ref # field, enter a reference number if desired.
- In the Pay To field, enter the payee’s name.
- From the Memo field’s drop-down, click a memo or manually enter one.
- In the Memo 2 field, enter a memo only for internal purposes, if desired. The memo will not display on the printed check.
- From the Account field’s drop-down, click the chart of accounts to which the bill applies. This account will auto-populate when you post a bill payment.
- Under the Options section, check the Discount for early payments box as applicable. When you apply payment, you will have the option to enter the applicable discount.
- Check the Hold bill payment box to prevent firm users from paying the bill until you remove the hold, if desired. The system will generate a warning message if a user attempts to pay a held bill.
- Check the Finance charge for late payments to apply finance charges to overdue bills. To set up finance charges, see Set Up Automatic Finance Charges.
- If the bill is a recurring item, check the Recurring box and from the drop-down, click the recurrence frequency.
The system will automatically generate recurring entries based on the duration you select. - Check the box to Post as matter expense, if applicable.
When you check the box, it displays a section within which you create an expense card or link to an existing one. - In the upper left corner, click Notes to add any internal notes regarding the bill, if desired.
- In the lower left corner, check Remember Payee for easy future tracking and payment, if desired.
- Take the appropriate action:
- Click Save and New to save the bill and enter another.
- Click Save to save the bill and return to the Accounts Payable screen.
Edit a Bill
To edit an accounts payable bill:
- From the left navigation panel, click Accounting.
- From the bottom of the Accounting left navigation, click Accounts Payable.
- On the Accounts Payable screen, double-click the bill, or single-click it to highlight it, and then from the toolbar, click Edit.
- On the Edit New Bill screen, make your changes.
- In the lower left corner, click Save.
The system updates the bill.
Delete a Bill
To delete an accounts payable bill:
- From the left navigation panel, click Accounting.
- From the bottom of the Accounting left navigation, click Accounts Payable.
- On the Accounts Payable screen, single-click the bill to highlight it, and then from the toolbar, click Delete.
The Delete Bill message reads: Are you sure you want to delete selected items? - Click Yes.
The system deletes the bill.
Search for Recurring Bills
To quickly find a recurring bill:
- From the left navigation panel, click Accounting.
- From the bottom of the Accounting left navigation, click Accounts Payable.
- From the toolbar atop the Accounts Payable screen, click Recurring Bills.
The Recurring Bills screen opens, listing all recurring bills. You can add, edit, and delete recurring bills from this screen or export a list.
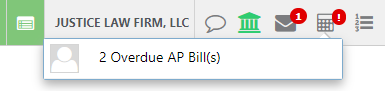
Toolbar Shortcut to Accounts Payable
The accounts payable notification icon at the top right of the application window will inform you of any overdue AP Bills. Clicking on this icon will take you to the Accounts Payable area.